|
~All images below
are clickable - click them to see a larger higher quality
image~
A couple of years ago, I came to the conclusion, after
seeing a few Root Cellars on some of my Client’s properties,
that it would be a great idea to have a root cellar, as
using the earth to cool in summer & heat in winter is
an AWESOME idea!
After doing a lot of research, I came to the conclusion
that I wanted to use a shipping container for the cellar,
bury it under dirt/material, and install a shed as a front
for it.
Now, a little explanation:
If you go on the web, and search out doing what I did,
you will come to see a LOT of people who say it can’t
be done safely; that the container will have extreme corrosion
issues, etc, and that it won’t take the weight of material
on the top without collapsing. I have found that the majority
of folks that post this either don’t know what they’re
talking about, or they work for or own a company that installs
root cellars or underground bunkers/etc.
Here is reality:
(A) Corrosion.
A shipping container is made from Cor-Ten steel. http://en.wikipedia.org/wiki/Weathering_steel.
This steel is made to seriously resist corrosion based
on salt laden ocean water, for decades. It is designed
to have ocean sprayed water on it every day, and is probably
THE most corrosion resistant steel there is, aside from
stainless steel. The shipping container I bought had been
sitting outside for 11 years when I bought it, AFTER being
used in the ocean for probably a decade at least prior
to that. It had spots of rust on it, and none of them
continued to rust through, all of them rusted on the surface,
and then stopped rusting, as the rust in Cor-Ten steel
provides an oxygen barrier that stops MORE rust from occurring.
(B) Shipping containers are made to be stacked on top
of each other, up to 22 containers high!!! BUT….the
ROOF of the containers are weak. All of the strength in
stacking is built into the corners of the container, so
as long as you concentrate the weight in the corners,
everything is fine. Since I couldn’t do this, I made
a skeleton frame inside, which you’ll see later.
I needed to find out what it would take to reinforce the
interior of the container for lateral (side) loads &
vertical loads from dirt, so I spoke to a Miner friend,
and also worked with a couple of engineers on the strength
of fir posts. Here’s what I found:
A single 4x4 NON-treated fir #1 post that is 8 feet long
will carry 8700 pounds vertically. IF you support it in
one place, it adds an additional 2,000 pounds of strength
to the post, if you add another support, it adds an additional
2,000 pounds MORE to the strength of the post. SO, in the
end, if you take a SINGLE 4x4, put 2 supports on it spread
evenly, it will carry around 12,800 pounds minimally, per
simple engineering. You can check it here; http://www2.wwpa.org/Portals/9/docs/PDF/TN9.pdf.
Please keep in mind that the numbers here are a little lower
than what I quoted, but I think they are erring on the side
of safety, which is all good with me. There’s a difference
in their numbers of a little over 1,000 pounds total, which
is small in the big scheme of things.
So, here’s what we did, and how we did it:
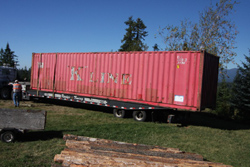
I bought a shipping container (40 foot) from a nice Lady
on Craigslist, and had it brought home by a towing company
on a long bed tiltable trailer.
After we it got here, we moved it into position (about
500 feet) by lifting it, and putting it on logs, and towing
it with my Skidsteer, rolling along on the logs.
Once we got it into a spot close to where I wanted to
bury it, we built out the inside of the container with 4x4
posts.
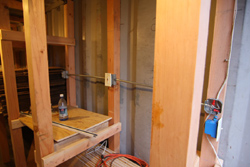
Here is how the posts were installed:
If you open the door, and look inside, the posts run from
left to right, 4 in a row. There are (4) uprights, with
a single crossing post sitting on top of all four, running
again, left to right, making a frame for each horizontal
(top) beam. At each upright on the outside, bottom, I installed
an “L” corner bracket made of ¼ inch steel
to hold the posts outward against lateral forces. I also
installed the same “L” corner bracket at the top
of the same outside upright, holding them in place, again,
against lateral forces. We started at the rear of the container,
working our way forward to the front, with each set of uprights
about 30 inches or so from the next, rear to front.
Then, came the digging….
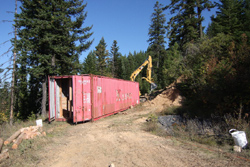
I rented a CAT 314 Excavator, and dug a big hole.
Now, when I dug the hole, I did (2) things that I think
are worth mentioning.
First, at the rear of the hole, I dug an additional “dugout”
maybe 10-15 feet deep, ABOVE the hole, to the rear. This
is to keep material from falling into the hole when it’s
getting moved into position. Second, I worked hard to get
a 22 degree down angle from the rear of the container to
the front, for water drainage. So, the front of the container,
by the doors, is at about a 22 degree angle “down”
from the rear of the container.
I used the excavator to drag the container into position,
and laid in about 2-4 feet of dirt across the entire container,
starting at the rear. (NOTE: If you decide to do this, load
material on TOP first, NOT the sides. If you load the top
first, it will preload the outer uprights inside, and hold
them firmly in place. If you put material on the sides,
it will blow out the outside uprights.)
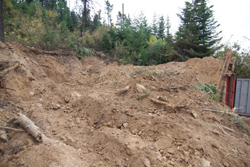
After I laid the container in the hole, I dug a trench
at the front of the container, horizontally, left to right,
and installed the rolling logs vertically, to hold back
the material/dirt for a year or so, to let it settle &
become firm.

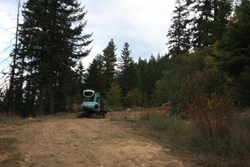
Here is a side view of the container, with
material on top:
The place I picked to locate this is out
of the way, it’s not real easy to see…
Now, we went to install the shelving.
We installed 2 cross braces (2x4’s) at each post,
between the outer upright & the inner uprights, to not
only provide more support for the uprights, but to make
shelves!
Then, we laid ½ inch plywood the length of the container,
this REALLY strengthens the entire framework:
& Installed Power..& LIGHTS!
After a couple of years, I can report the following:
Winter time temps don’t go below freezing (inside),
summertime temps don’t get above 60, humidity stays
at 50% or so, and it is a GREAT storage facility.
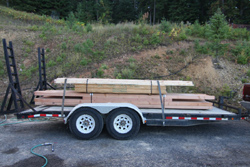
We spent around $3,000 total on this, including lumber,
and it’s just an excellent cool storage. We moved a
26CF chest freezer into it, & bought another one for
the house, enlarging our capacity to keep frozen foods.
In the end, we bought a used 12x12 insulated shed (no windows),
and moved it onto a concrete pad that we poured in front
of the container. Before I put the shed on the cement, I
removed the posts holding back the dirt, and laid in (8)
cement ecology blocks, to hold back dirt. After we did this,
we found that water was trying to come over the edge of
the container door when it rained, so we built an extension
of the roof, back over the container itself, maybe 8 feet
or so.
Now, the entire debacle looks like nothing more than a
nice, clean little shed against a hillside…..works
for us.
Chris
Back To Off Grid Living
|